| TL125 Controls |
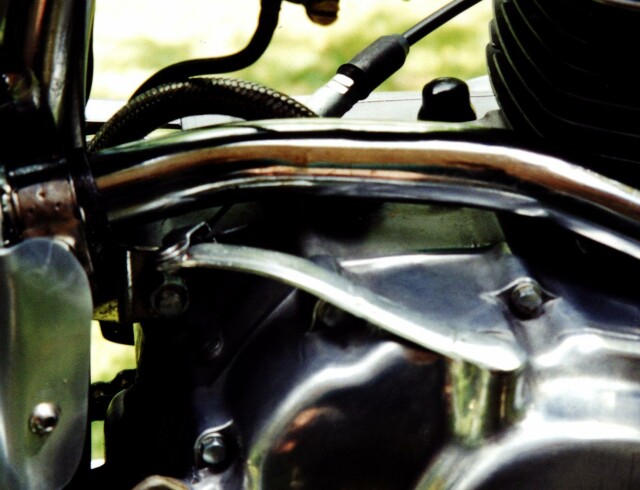
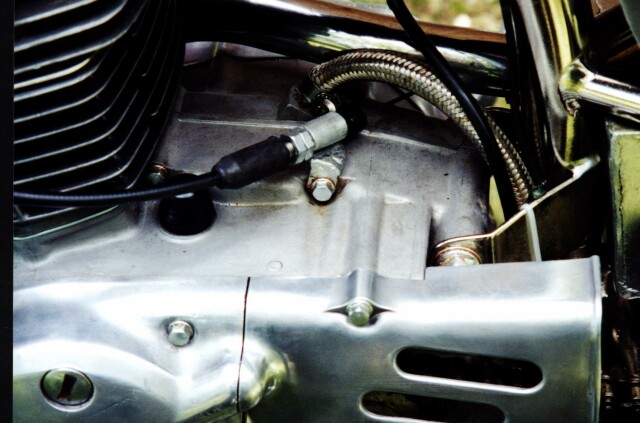
The off-the-shelf clutch lightener boxes look pretty untidy so another method had to be found. Simply lengthening the lever on the clutch cover was also out, because of a lack of room for the cable next to the base of the cylinder barrel. The only way simple and elegant way out was to reroute the cable around the other side of the barrel and make a new bracket to suit.
The standard Honda clutch arm is approximately 80mm long between centres. I cut this off at the pivot end and lengthened it to 120mm long. This was actually done by cutting-and-shutting two levers and bending them to follow the contours of the clutch cover in an attempt to make the finished job look 'factory'. The lever was then welded back onto it's shaft approximately 45 deg anticlockwise from standard. Leave the welding until the cable bracket is fitted.
I have used the standard TL clutch cable, re-routed around the other side of the engine with the outer held by the stock bracket, also cut-and-shut, mounted onto the top crankcase bolt, just behind the cam chain adjuster locknut.
With the cable in it's new mounting, the longer clutch arm was then welded on, with the cable fitted, to give the correct orientation.
It may be possible to use a front brake cable instead, with a little extra work on the bracketry. This would mean that only one type of cable would need to carried on long distance events.
I hope that the photos explain things better than my rambling prose.
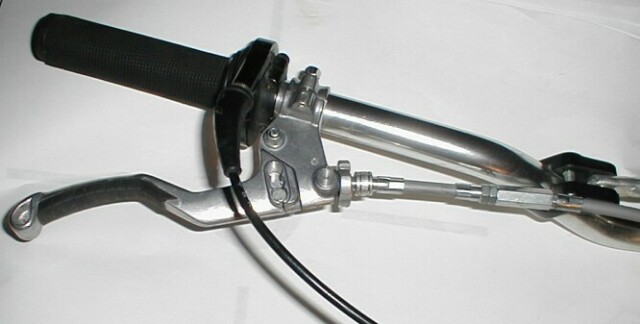
For those interested the MSR part number is 334-1812, MSR Adjustable Clutch - Standard, Black (available also in shorty model).
Besides the brake shoes the weakest link is the brake cable itself. Even a small amount of compression in the cable housing causes a substantial loss of brake feel and excessive lever travel. The best cables I have found so far are Motion Pro T2 cables. They have a three layer construction, and the middle layer consists of longitudal steel braiding. Whether this is the reason, or just their beefier build, but using this T2 cable as front brake cable gives a great improvement over normal brake cable. Unfortunately these cables are not available for vintage applications like the TL, so you have to make your own from a clutch cable.
I spent some time looking at modern dirt bike clutch cables, and decided that the modern Honda CR500R cable makes a great donor (MotionPro identifies the cable fit as 90-98 CR500R). I then cut the bottom nipple away, shortened the housing and the cable and soldered on a new lower nipple. Remember to pull out the cable housing end piece and slide it over the new lower end prior to welding in the nipple. Ditto for the front brake adjuster piece, at least the brass nipples I use are too large to go through the adjuster (this may not be the case for TL, remember, I have TY front fork and brakes). Be careful with the soldering and test your work afterwards to be sure the nipple doesn't get loose. You can see the cable at the picture above on the article about MSR Raptor clutch perch.
Last modification February 16, 2003 |
 |
| TL125 Controls |